Visa Photo Rejections: 12 Fixes to Pass Automated Checks on the First Try

Millions of e-visa and passport photos are rejected every year, and 70 percent of those knock-backs are now flagged by fully automated image-verification engines rather than human clerks (source: ICAO TRIP 2024 report). The good news? Most of those failures stem from a short list of fixable mistakes—wrong background color, awkward shadows, low resolution, or a smile that’s just a little too enthusiastic.
Below you’ll find 12 proven fixes that will help your picture sail through automated checks the first time, saving you money, stress, and last-minute reshoot delays at the airport.
Why Automated Photo Bots Reject Your Picture
Border-control agencies have adopted computer-vision algorithms powered by International Civil Aviation Organization (ICAO) standards (Doc 9303) to score every image on dozens of points in under two seconds. Typical triggers for instant rejection include:
| Rejection Trigger | Automated Check | Typical Threshold |
|---|---|---|
| Non-uniform background | Histogram analysis for color variance | < 2 % pixel deviation |
| Wrong aspect ratio | Edge detection & landmark placement | 4:5 or 35×45 mm ±1 mm |
| Poor resolution | DPI & pixel-count scan | ≥ 300 DPI and ≥ 600×600 px |
| Harsh shadows/glare | Contrast & specular-highlight map | < 20 % bright-spot area |
| Closed or sideways eyes | Facial-landmark AI model | Eyes detected, horizontal |
| Filters/compression | JPEG quality factor & EXIF | QF > 70, sRGB color space |
Fail any single line, and the whole application is suspended until you upload a replacement. Let’s stop that from happening.
12 Fixes to Pass Visa Photo Checks on the First Try
1. Set Up a Truly Neutral Background
- Hang an ironed, matte white or very light-grey sheet against a wall.
- Avoid texture, patterns, or seams; even faint wallpaper stripes trip histograms.
- Stand at least 50 cm in front of the backdrop to reduce shadows.
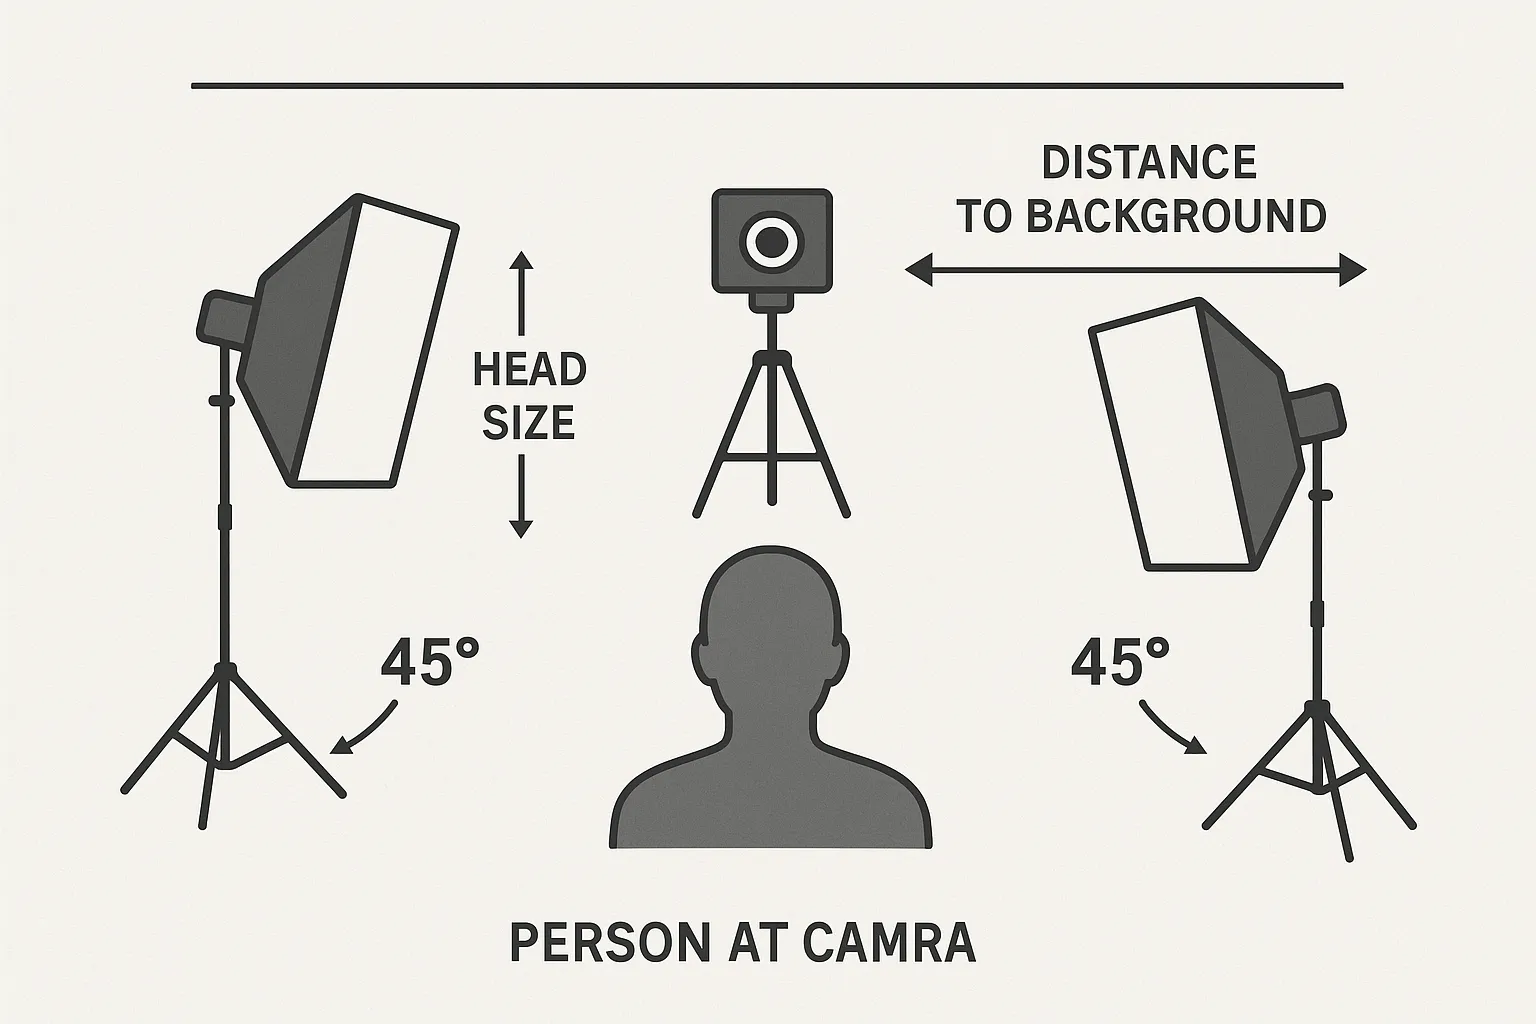
2. Use Soft, Even Lighting
- Face a window or two diffuse LED panels placed at 45° angles.
- Eliminate overhead lighting that creates nose or eye-socket shadows.
- Never use a direct flash; it causes hotspots the algorithm reads as glare.
3. Position the Camera at Eye Level—No Tilt
- Mount the phone or DSLR so the lens is exactly level with your eyes.
- A slight upward or downward tilt distorts facial ratios and head size.
4. Keep a Neutral Expression, Mouth Closed
- Slightly parted lips or visible teeth remain a top 10 rejection reason.
- Relax jaw muscles and focus on the lens; do not raise eyebrows.
5. Fill 70–80 % of the Frame With Your Head
- Measure on-screen: from chin to crown should be 32–36 mm on a 45 mm-high image.
- Too small and the face-landmark AI can’t lock; too large and you’ll fail the crop test.
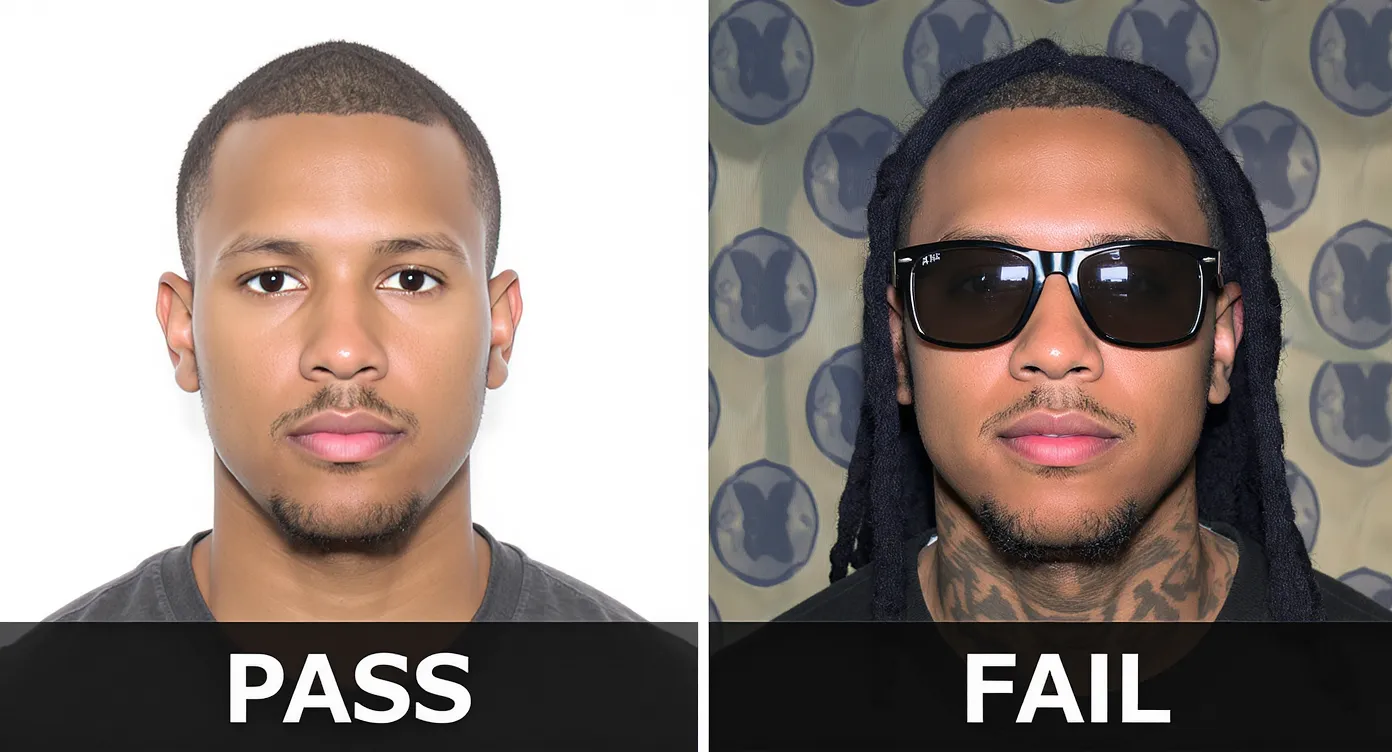
6. Remove Glasses or Kill the Glare
- If you must keep prescription lenses, angle lights downward slightly.
- Anti-reflective coating helps, but if glare covers pupils, the bot will fail you.
7. Reveal the Full Face—Head Coverings Only for Religion or Medical Reasons
- Tuck stray hair behind ears; ensure eyebrows and cheekbones are visible.
- For permitted coverings, choose a solid, contrasting color (not white) and keep fabric away from the face outline.
8. Capture at 600×600 px Minimum, 300 DPI
- Most e-visa portals reject images under 50 KB or below 600 px.
- Shoot at the phone’s highest resolution, then crop—don’t upscale later.
9. Stick to sRGB Color and Moderate JPEG Compression
- Export or save in sRGB; Adobe RGB or ProPhoto profiles can break older validation libraries.
- Keep file size under 240 KB unless the destination specifies more.
10. Use a Recent Photo—Taken Within the Last Six Months
- Automated “age-gap” detectors compare wrinkles and iris detail with passport records.
- Change of hairstyle, facial hair, or significant weight loss can also trigger a manual review; update the photo if in doubt.
11. Disable Beauty Filters, HDR, and Portrait Mode
- Skin-smoothing or background-blur algorithms alter pixel edges the AI relies on.
- Turn off “Live Photo,” “Portrait,” or “Night” modes before shooting.
12. Run a Pre-Submission Validator
- Many governments (e.g., U.S. DOS Photo Tool, Australia’s Document Checker) offer free web validators.
- SimpleVisa’s guided application flow automatically flags size, background, and glare issues before you press Submit, eliminating the guess-work and reshoot emails. See the full document checklist for details.
Quick-Reference Specs for Popular e-Visa Programs (2025)
| Destination | Dimensions & Ratio | Background | File Size | Extra Notes |
|---|---|---|---|---|
| India eVisa | 2×2 in (51×51 mm) or 600×600 px | White | 10–200 KB | Head 1–1.4 in; eyes 1.125–1.375 in from bottom |
| Kenya eTA | 500×500–2,000×2,000 px | White or light blue | ≤ 512 KB | No glasses; JPEG only |
| Australia ETA | 35×45 mm or 826×1,063 px | Light grey | ≤ 250 KB | Head height 32–36 mm |
| Türkiye eVisa | Min 600×600 px | White | ≤ 300 KB | Neutral expression mandatory |
Always verify the latest rules on the official portal or inside SimpleVisa’s country-specific wizard before uploading.
Shooting With a Smartphone? Follow This 60-Second Workflow
- Switch to rear camera for higher resolution.
- Clean the lens—a fingerprint smudge can drop sharpness below 10 lp/mm.
- Enable grid lines to center eyes on the upper third.
- Turn off flash; use window light or a ring light.
- Hold 1 m away; tap your face to lock focus and exposure.
- Take three shots; choose the sharpest one in the gallery.
- Crop to 4:5 aspect ratio before saving.
This micro-checklist mirrors the automatic prompts you’ll see inside SimpleVisa’s white-label app, giving you a consistent pass rate across more than 50 destination photo specs.
What Happens After You Upload a Perfect Photo?
- Instant AI pass/fail (sub-second)
- Embedded EXIF & encryption check (1-3 s)
- Biometric template extraction for future border matching (Kenya, UAE, EU ETIAS) (1-5 s)
- Application proceeds to data-consistency and watch-list screening
Because your photo already meets ICAO specs, you avoid the repeat-submission loop that adds, on average, 2.8 extra days to global e-visa processing time (SimpleVisa analytics, Q2 2025).
Next Steps
- Planning a multi-country trip? Let SimpleVisa surface the exact photo specs—and every other document rule—right inside your booking flow.
- Already have a headshot you love? Drag-and-drop it into the SimpleVisa checker; it will highlight issues in real time so you can fix them before paying fees.
A compliant photo is the fastest approval insurance you can buy—and unlike express processing, it costs nothing but a few extra minutes of preparation. Follow the 12 fixes above, and you’ll never have to wonder if that tiny glare on your glasses could derail your journey again.