Passport Scan Quality Guide: MRZ, Glare, and Cropping Tips
A blurry passport image is one of the fastest ways to turn a “5-minute online application” into days of back-and-forth. Most modern electronic visa (eVisa) and ETA portals rely on automated checks first, OCR (text recognition), document-security heuristics, and sometimes human review after. That means small capture mistakes, like glare on the Machine Readable Zone (MRZ) or cropping off a corner, can trigger an upload failure, a resubmission request, or a delay.
This guide focuses on the three issues that cause the most avoidable rejections in passport scans and photos: MRZ readability, glare, and cropping.
What the MRZ is (and why scan quality matters)
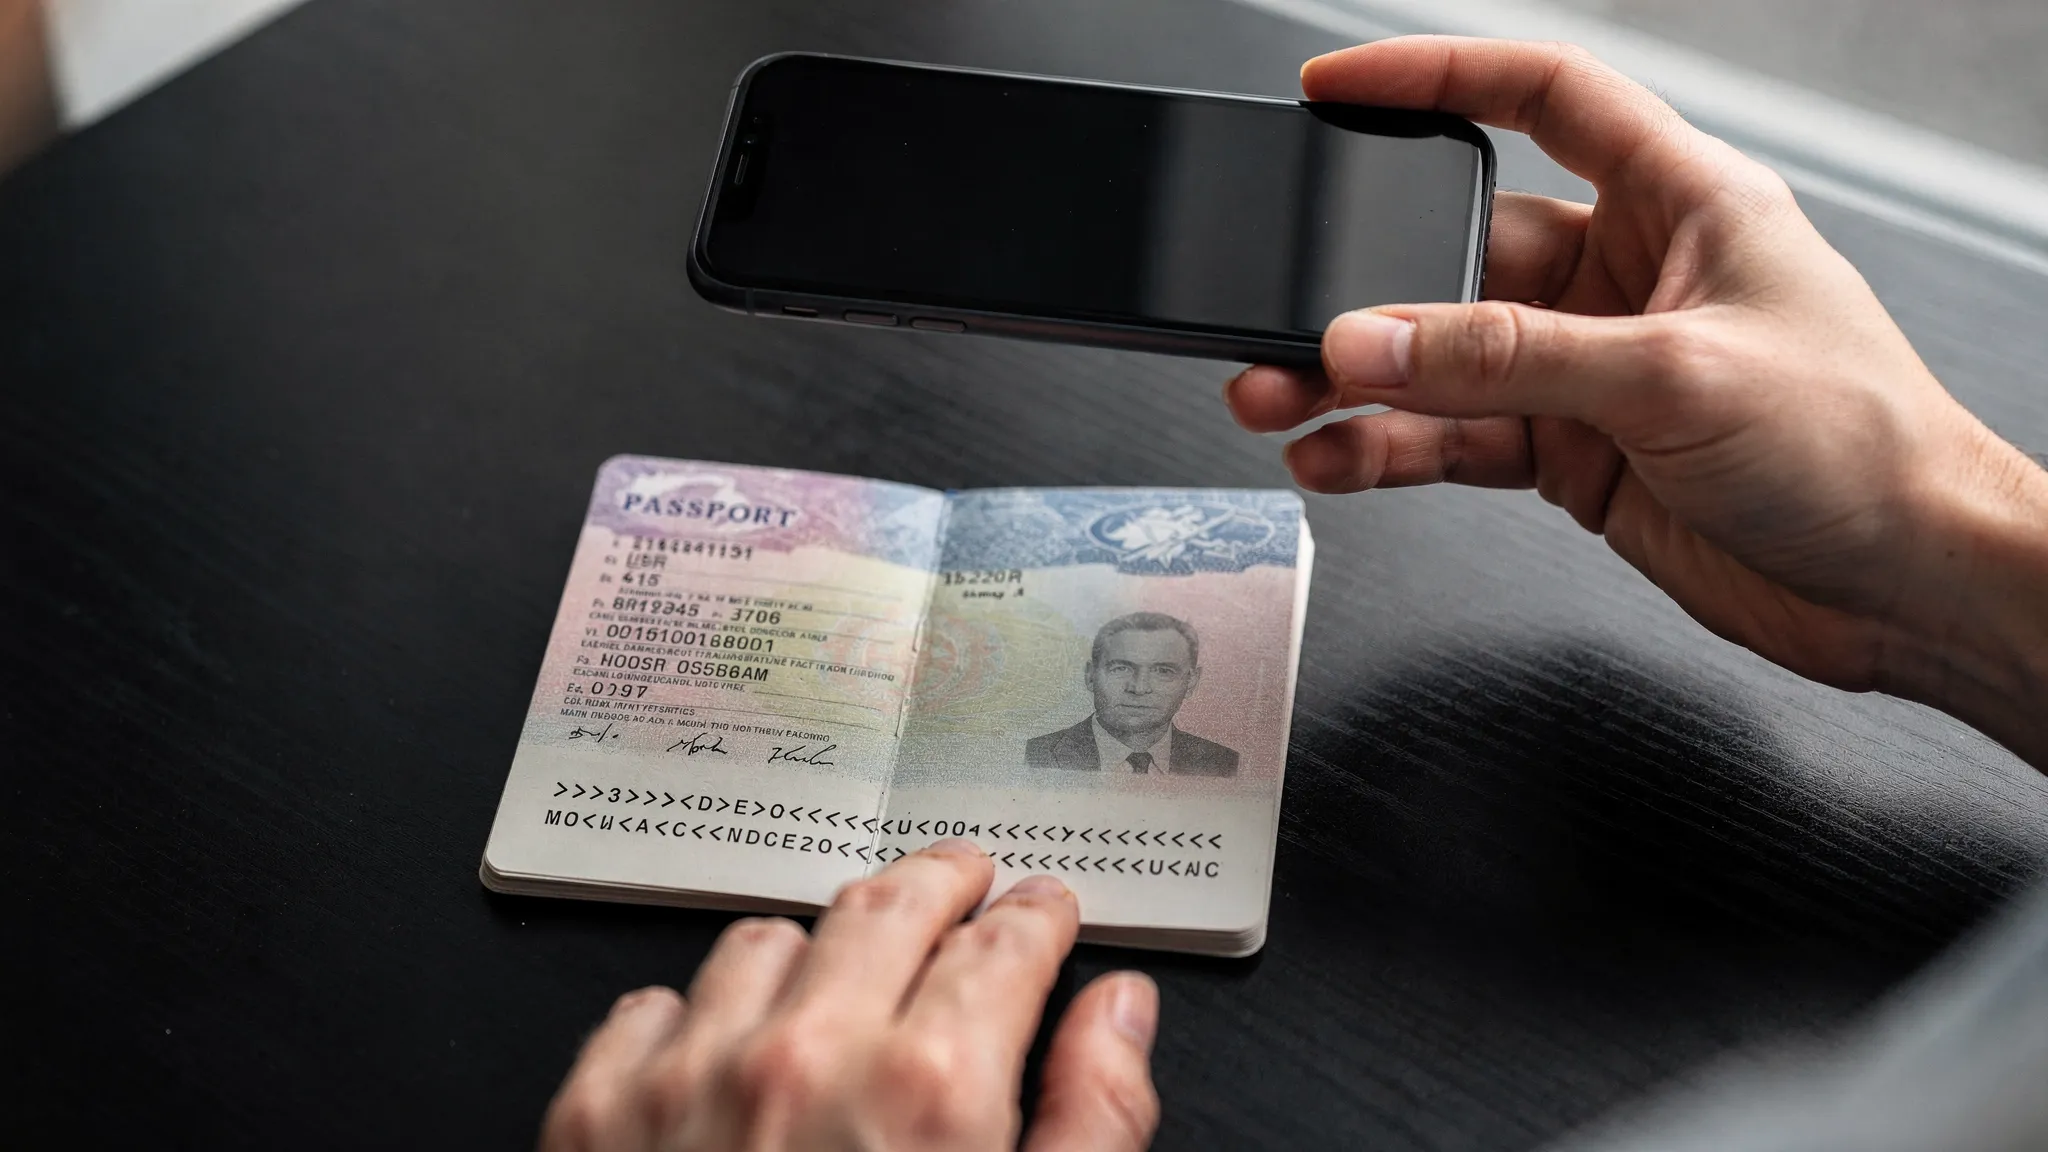
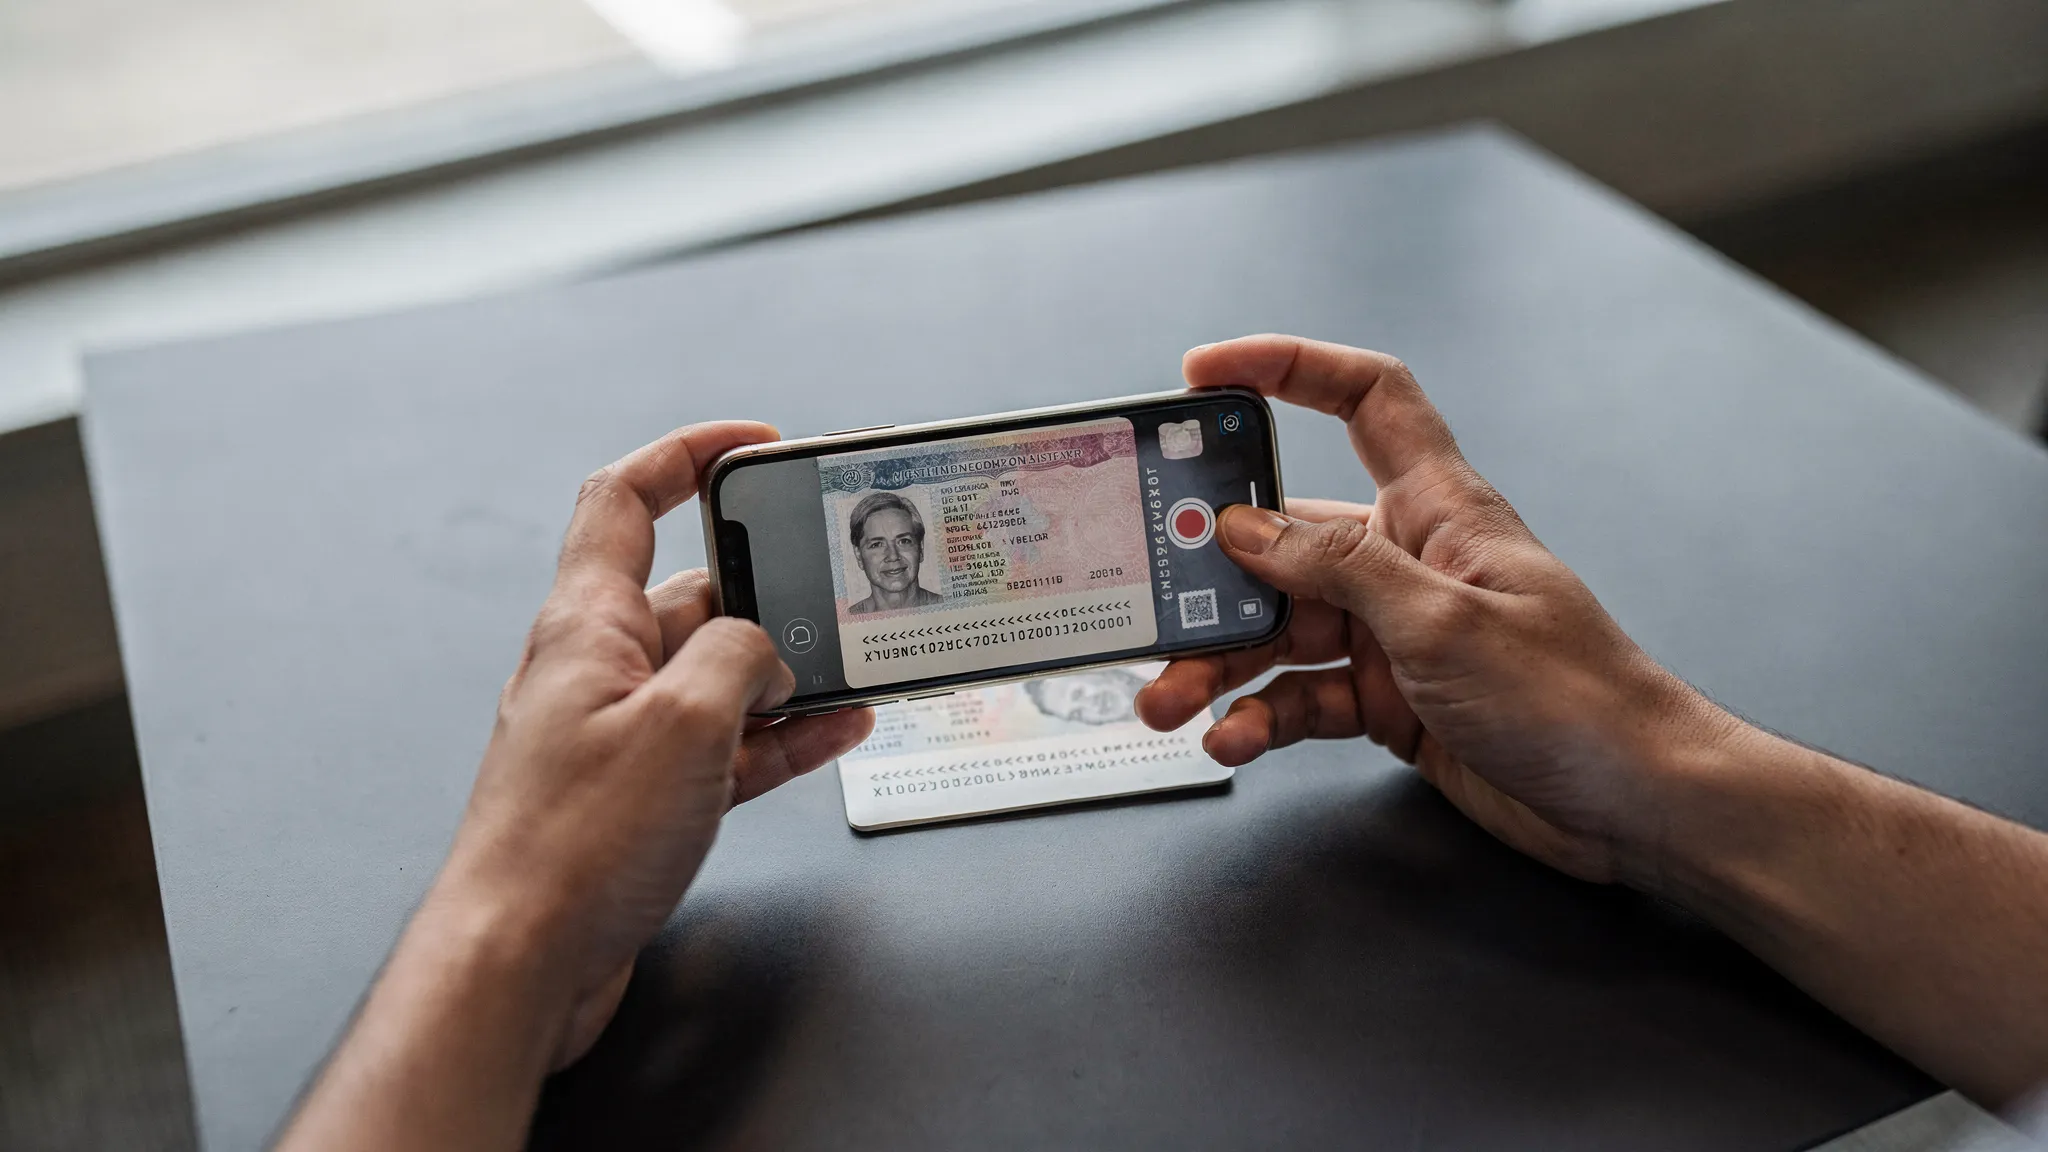
The Machine Readable Zone (MRZ) is the two lines of text at the bottom of a standard passport bio-data page. It is designed to be read quickly by machines, and it is the most important part of your passport image for many online visa processing systems.
Even when an application asks for “passport photo page,” what the system often needs is:
- A sharp image where the MRZ characters are fully visible
- A clear view of the passport number, name, date of birth, and expiry date (which are also encoded in the MRZ)
- Enough context around the page to confirm the document is real (not tightly cropped text)
If you want a deep technical reference on why MRZ formatting is standardized globally, the baseline spec is set by the ICAO Doc 9303 standards for machine readable travel documents.
The 3 most common passport scan problems (and how to fix each)
1) MRZ is unreadable (blur, motion, compression)
What it looks like: You can read the passport page when zoomed out, but when you zoom in, the MRZ characters look soft, “muddy,” or pixelated. Letters like O and 0, B and 8, or < separators blend together.
Why it fails: OCR needs crisp edges. Many portals also apply automated “quality gates” (sharpness, contrast, minimum resolution). If the MRZ fails, the whole file can be rejected.
Fixes that work reliably:
- Hold still and use a timer: A 3-second timer reduces micro-shake.
- Tap to focus on the MRZ area: On most phones, tapping the MRZ forces focus and exposure where it matters.
- Avoid messaging apps for sending files to yourself: Apps can compress images aggressively. Use AirDrop, email as an attachment, cloud drive, or direct upload.
- Prefer good light over digital zoom: Move closer instead of zooming.
2) Glare and reflections (holograms, lamination, overhead lights)
What it looks like: A bright white streak, a hotspot, or rainbow-like reflection across the photo or text. Often it lands right on the MRZ or passport number.
Why it fails: Glare wipes out pixels in key areas, so OCR cannot “see” characters. It can also trip tamper or fraud signals if the system detects abnormal brightness patterns.
Fixes that work reliably:
- Turn off flash: Flash is the #1 glare cause on laminated passport pages.
- Use indirect light: Stand near a window (daytime) or bounce light off a wall.
- Change the angle slightly: Keep the camera parallel to the page, but tilt the passport a few degrees until the glare moves away from the MRZ.
- Avoid glossy surfaces under the passport: A matte dark background reduces reflected light.
A useful mental model: any serious digital workflow that depends on image capture, from travel documents to healthcare imaging, needs consistent “no glare, no blur” inputs. You can see the same discipline in areas like digital orthodontics planning, where clean scans and controlled lighting are essential for accurate 3D analysis.
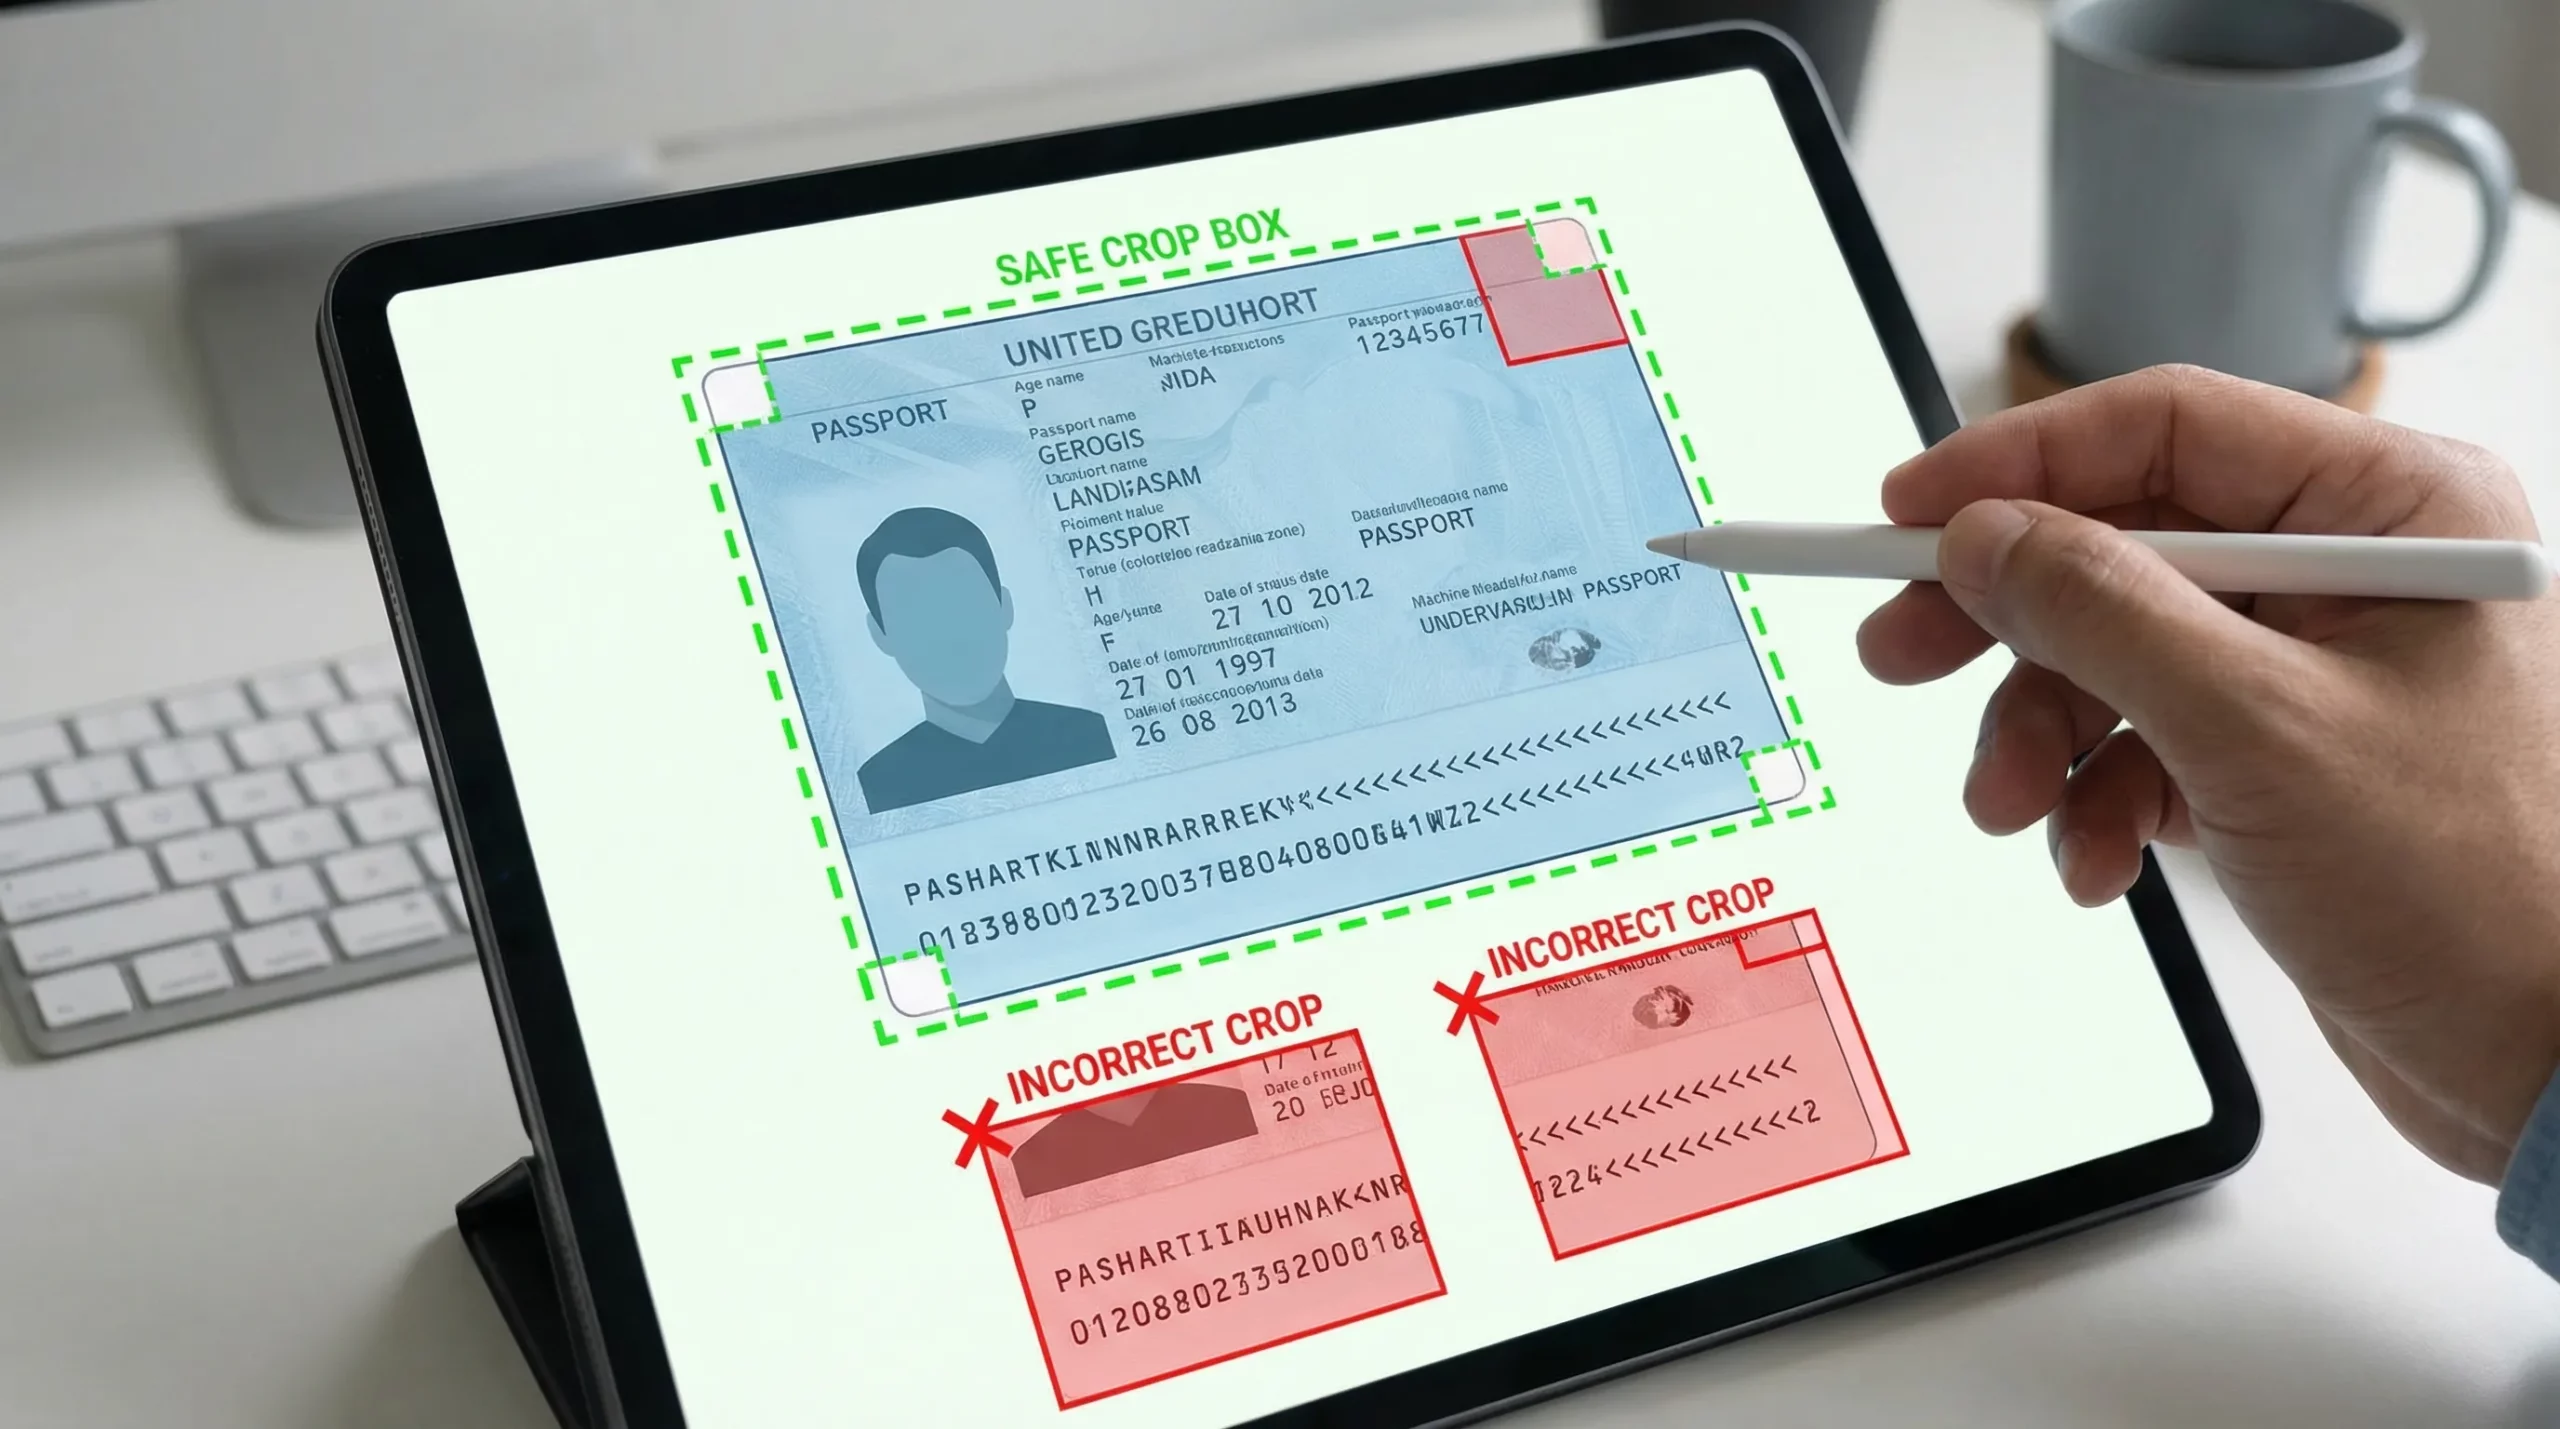
3) Cropping mistakes (missing edges, cut-off MRZ, “too tight” framing)
What it looks like: The MRZ is partially cut off, the top of the page is missing, or the passport page fills the frame so tightly that corners are not visible.
Why it fails: Many portals need the full page to validate layout, security features, and that the MRZ lines are complete. Cropping also increases the risk that the image was edited.
Fixes that work reliably:
- Include all four corners of the bio-data page.
- Leave a small margin around the page so the system can see edges.
- Do not crop to just the MRZ unless the instructions explicitly ask for MRZ only.
Best-practice setup: phone photo vs flatbed scan
For many travelers, a phone capture is the only option. For travel agencies, airlines, or support teams preparing “how to upload your passport” guidance, it helps to define what “good enough” looks like.
| Method | When it’s best | Pros | Watch-outs |
|---|---|---|---|
| Smartphone camera | Most eVisa/ETA applications | Fast, accessible, easy retakes | Glare, blur, perspective distortion |
| Scanner (flatbed) | Back-office processing, corporate travel, organized travelers | Even lighting, sharp text, consistent output | Over-cropping by scanner apps, very large files |
Scanner tips (if available):
- Scan in color unless the portal asks otherwise.
- Ensure the MRZ remains sharp after saving as PDF or JPG.
- Avoid “document enhancement” filters that create halos around text.
Step-by-step: how to capture a passport image that passes checks
Step 1: Prepare the document
- Use the passport bio-data page (the page with your photo and details).
- Wipe fingerprints gently with a soft cloth if the page looks smudged.
- Flatten the page as much as possible without forcing the binding.
Step 2: Control your environment
- Choose bright, even light (near a window is ideal).
- Place the passport on a matte, dark background.
- Avoid patterned backgrounds (they can confuse edge detection).
Step 3: Capture correctly
- Hold the camera parallel to the page.
- Fill most of the frame, but keep all corners visible.
- Tap to focus on the MRZ lines.
- Take 2 to 4 shots and keep the sharpest.
Step 4: Do a 10-second quality check before uploading
Open the image and zoom in.
- MRZ check: Can you clearly read every character in both MRZ lines?
- Glare check: Is any key text “washed out” by a bright reflection?
- Crop check: Are all four corners visible with a small margin?
- Edit check: Avoid heavy editing, filters, or background removal unless instructed.
If any answer is “no,” retake the photo. Retaking is almost always faster than waiting for a resubmission email.
Quick “pass or fail” troubleshooting table
Use this when a portal rejects an upload, or when you are building help-center content for customers.
| Error symptom | Likely cause | What to do next |
|---|---|---|
| “MRZ not detected” or “document unreadable” | Blur, low resolution, compression | Retake in brighter light, tap to focus on MRZ, avoid sending through chat apps |
| “Image has glare” or repeated manual review requests | Flash or overhead reflection | Turn off flash, shift angle, use indirect light |
| “Document incomplete” | Cropped edges, missing corners, cut-off MRZ | Reframe to include all corners and the full MRZ lines |
| Upload succeeds but later asked to re-upload | Quality gate passed, but human review found issues | Submit a clearer image, verify name/passport number match the form |
For issues beyond scan quality, like mismatched names between booking and passport, this separate guide can help: Handling Name Mismatches on Tickets, Passports, and eVisas: Fixes and Prevention.
Tips for travel brands: reduce resubmissions and support tickets
If you operate a travel site, airline, OTA, cruise line, or TMC, passport capture quality is not just “traveler error.” It is a UX and operations lever.
A few high-impact improvements:
- Show one good example image and one bad example (glare, crop too tight). This often outperforms long text.
- Place MRZ-specific microcopy next to the upload button: “Ensure both MRZ lines are fully visible and not blurred.”
- Add a pre-upload checklist (3 items max) rather than a full page of rules.
- Offer a retry loop immediately after upload with “looks blurry” guidance (instead of failing later in the workflow).
If you are building a broader document readiness flow, pair this guide with: Checklist: Everything You Need Before Submitting an Online Visa Application.
Frequently Asked Questions
What is the MRZ on a passport? The MRZ (Machine Readable Zone) is the two-line code at the bottom of your passport photo page. Many online visa systems use it to extract your passport details automatically.
Should I use flash when taking a passport photo for an eVisa? Usually no. Flash commonly creates glare on the laminated passport page, which can hide text and make the MRZ unreadable.
How much of the passport page should be visible in the image? In most cases, capture the entire bio-data page, including all four corners and the full MRZ lines, with a small margin around the page.
Is a scan better than a photo for online visa processing? A flatbed scan can be more consistent, but a well-lit, sharp phone photo typically works fine if it avoids glare and includes the full page.
Why did my upload pass, but later I was asked to submit a new passport image? Automated checks can accept borderline images that later fail human review. The most common reasons are slight MRZ blur, glare over key fields, or overly tight cropping.
Make passport capture “one-and-done” in your visa flow
If you are a travel business, repeat passport re-uploads are a conversion killer and a support burden. SimpleVisa helps travel brands streamline online visa processing with guided customer applications and flexible integration options, including API integration, a white-label visa application app, and no-code implementation.
To see how a guided visa journey can reduce document errors while unlocking ancillary revenue, explore SimpleVisa.